Tutorial (Java)
This tutorial describes how to create a simple agent for the competition in Java.
This tutorial uses screenshots from the Java IDE Eclipse 4.6.3 for Linux but should work for any IDE.
Step 1: Download the engine from GitHub
Go to the competition’s GitHub repository and either checkout the master branch using your favourite Git client or simply download everything as a .zip file.
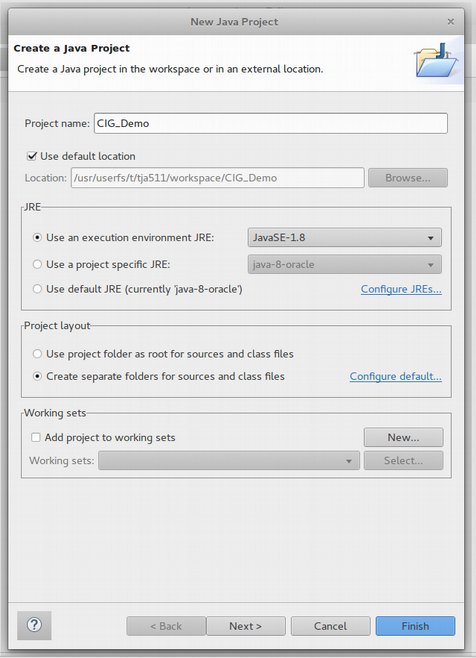
Step 2: Create a new Java 8 Project
Do this with your IDE of preference but to ensure compatability make sure that you are using Java 1.8 and above.
Step 3: Add the engine to the class path
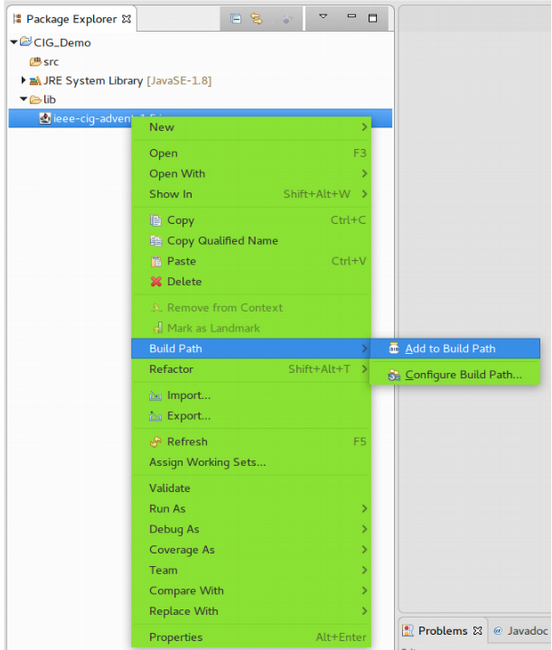
The Z-Machine engine and base agent classes can be found in a .jar in “Example Project/lib3rd” in your downloaded repository. The most recent iteration at the time of writing is Version 1.5, found at ieee-cig-advent-1.5.jar. Place this .jar inside a /lib folder within your newly created project.
Add this .jar to your newly created Java project’s class path. In Eclipse 4.6.3 this can be done by right clicking on the .jar and adding it to the build path of the project. If you are unsure, search for instructions on adding a .jar to the class path for your specific IDE.
Step 4: Create a new Agent
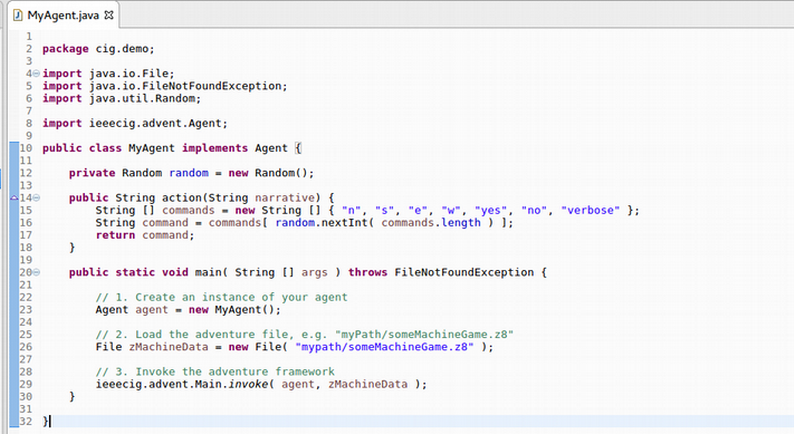
Create a java class named ‘MyAgent’ in a package of your choice and import “ieeecig.advent.Agent” so that your new class implements “Agent”. The new class should then look like this:
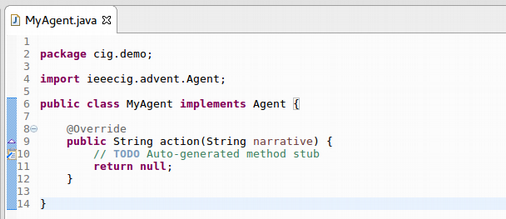
This is the entirety of your Agent’s interface with the Z-Machine. Narrative text is scraped from the Z-Machine and passed to the agent using the “action” method as the “narrative” argument. The expected response is some valid Z-Machine command to continue the story, although any string returned will be accepted and entered into the Z-Machine causing unspecified actions to return a “narrative” description of errors.
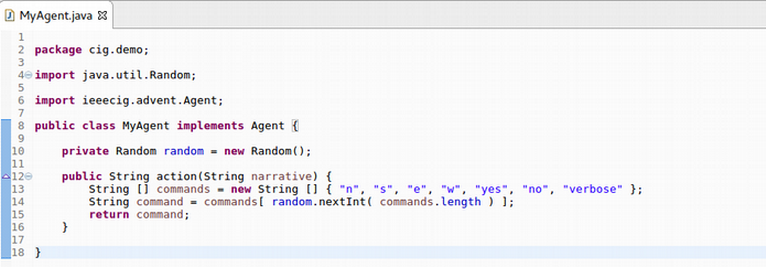
To run MyAgent we firstly need to create some behaviour, however basic. For this example, we will return a command picked randomly from a pre-defined set of commands, regardless of the narrative passed to the agent. You can find extended source code of this example agent here.
Step 5: Running the Agent
The final step is to test this Agent out on a Z-Machine game. Do this by invoking the engine as shown, passing an instance of your Agent and a Java File object pointed at the game you wish to run:
You can try this out with the Monkey and Bananas demo provided in the repository.